If you’ve ever installed a cabinet or interior door panel, you know that the small, often overlooked edge banding strip along its perimeter does more than just look neat. It protects the raw, porous wood particleboard or MDF underneath from moisture damage, prevents dust and pests from seeping into the core, and gives the door a smooth, professional finish. As someone who’s supplied door panel edge banding to cabinet makers, remodelers, and millwork shops for over a decade, I’ve seen firsthand how even a high-quality banding strip can fail to stick if the application process skips critical steps. A loose edge band doesn’t just lead to callbacks for contractors—it erodes customer trust and costs businesses time and money. Today, I’m breaking down the science behind reliable edge band adhesion, the common mistakes I see on job sites, and the steps I’ve shared with my clients to make sure every strip stays put for years. Door Panel Edge Banding

First, let’s get clear on what edge band adhesion actually relies on. It’s not just a “glue sticks to wood” process—it’s a combination of material compatibility, surface preparation, application conditions, and tool calibration. The core of most door panels I supply edge banding for is medium-density fiberboard (MDF) or particleboard. These engineered wood products are porous, but their surface texture and cleanliness matter far more than many installers realize. MDF, in particular, has a dense, smooth face compared to particleboard’s more open, uneven surface. Even a small amount of residual wood dust, sawdust, or oil from cutting tools can create a barrier between the glue and the panel, preventing a strong bond. I’ve had clients come to me with complaints about bands peeling off, only to find out their shop was wiping panels with a dirty rag that left lint or leftover adhesive from a previous job. That’s not a defect in the banding—it’s a preventable misstep.
Surface preparation is the first non-negotiable step. Too many installers rush this part, sanding lightly with a worn orbital sander or skipping cleaning entirely. For MDF, you want to lightly scuff the edge with 120-grit sandpaper, just enough to remove the glossy factory finish without creating deep scratches that trap air bubbles between the band and the panel. For particleboard, which has coarser edges, 80-grit sandpaper works better to open up the pores so the glue can seep in. But sanding isn’t enough. After sanding, every edge needs to be cleaned with a lint-free cloth and a mild, non-silicone degreaser. Silicone-based cleaners are a big no here—they leave a residue that repels glue, and it’s almost impossible to fully remove. I recommend using isopropyl alcohol (70% solution) or a dedicated wood edge cleaner, which you can pick up at any hardware store. Wipe the edge once, then immediately wipe it with a dry cloth to remove all moisture. Wet edges can cause the glue to cure too slowly, and excess water can warp the panel’s edge over time. I once had a client who skipped this drying step and ended up with 20 cabinet doors with warped edges because the damp MDF expanded after edge banding, pulling the loose strip right off.
Next, the glue and banding material pairing is critical. As a supplier, I offer three main types of edge banding: PVC, acrylic, and wood veneer, and each needs a specific adhesive. PVC is the most common for interior door panels, and it pairs best with hot-melt adhesive (HMA) — the standard for edge banding machines. Hot-melt glue works because it’s applied molten, seeps into the panel’s pores, and cools to create a rigid, strong bond. But not all HMAs are the same. Low-tack HMAs, which are sometimes used for temporary holds, will never create a long-lasting bond. I always advise clients to use a high-temperature, high-tack HMA rated for wood substrates. For wood veneer edge banding, which is popular for high-end, natural-looking doors, you need a water-based or polyurethane (PU) adhesive. Water-based adhesons work for veneer, but PU is more flexible and resistant to humidity, making it ideal for bathrooms or kitchens where moisture is a concern. The biggest mistake here is mismatching glue to banding: I’ve seen installers use PVC-specific HMA on wood veneer, which can cause the veneer to bubble and peel within six months. That’s avoidable with a quick check of the adhesive’s label—most manufacturers specify compatible substrates right on the tube or drum.
Then there’s the application process itself, which is where most installers cut corners. If you’re using a cold-cure edge banding adhesive (for smaller, manual jobs), you have to apply it evenly to both the panel edge and the back of the band. For manual application, use a small brush or a notched trowel with evenly spaced teeth to ensure the glue layer is consistent—too thin, and it won’t fill the gaps between the band and the panel; too thick, and it will squeeze out unevenly, leaving gaps or making the band shift before it sets. For automated edge banding machines (which are standard for most millwork shops), you have to calibrate the glue applicator nozzle correctly. The nozzle should be positioned 1/32 to 1/16 of an inch away from the edge, so it deposits a continuous, uniform line of glue without excess. Too close, and it gets tangled in the machine’s feed rollers; too far, and the glue doesn’t transfer to the edge. I’ve worked with a few small shops that tried to save money by skipping machine calibration, and they ended up with 15% of their bands failing to adhere, costing them more in rework than the cost of a calibration check.
Pressure is another key factor that’s often overlooked. Glue only bonds when it’s compressed tightly between two surfaces. For automated machines, most come with pressure rollers that apply consistent, even pressure as the band is fed onto the edge. For manual application, you have to use a roller or a block of hardwood to press the band firmly against the edge immediately after applying the glue. If you’re working on a curved door panel (like an arched top cabinet door), you have to use a flexible roller that follows the curve, not a rigid one that only presses in the center, leaving gaps at the edges. I once helped a client fix a batch of curved oak doors where the bands had peeled off at the ends—they’d used a rigid metal block to press the band, so the edges never made contact with the glue. A 10-minute change to using a flexible roller fixed that issue completely. Also, you have to hold the pressure for the full cure time of the glue. Hot-melt glue sets in seconds, but it takes 24 hours to reach its full bond strength. Too many installers trim the excess edge band immediately after applying it, without letting the glue cure. That creates tiny, almost invisible gaps where moisture can seep in, leading to peeling over time. I always tell clients to wait at least 30 minutes after pressure is applied before trimming, and 24 hours before installing the door.
Environmental conditions also play a huge role in adhesion. Edge banding shouldn’t be applied in temperatures below 60 degrees Fahrenheit or above 90 degrees. Cold temperatures make hot-melt glue thicker, so it doesn’t seep into the pores of the panel properly. Hot temperatures cause the glue to cool too quickly, creating air bubbles between the band and the panel. Humidity is another factor: above 60% humidity, wood panels absorb moisture, which breaks down the glue’s bond. For jobs in basements, bathrooms, or outdoor door installations, you need to adjust both the adhesive and the application process. I recommend using a moisture-resistant PU adhesive for these areas, and waiting for a dry stretch of weather to apply the banding. One of my regular clients who does a lot of bathroom remodels swears by this—he told me he used to have a 10% callback rate for edge banding issues before he started adjusting for humidity, and now it’s less than 1%.
Now, let’s talk about the mistakes that I see most often, because being aware of them is half the battle. The first is using worn-out edge banding. As a supplier, I only offer edge banding with a consistent thickness and uniform surface, but installers sometimes buy off-brand bands that are too thin or have inconsistent edges. These bands don’t fit tightly against the panel, leaving gaps for glue to pool (or not pool, if it’s too thin) leading to poor adhesion. Another common mistake is trimming the band too early, as I mentioned earlier. Some installers use a router or trim saw too soon, which can pull the band loose before the glue has set. And finally, not storing edge banding correctly. If you leave PVC edge banding in direct sunlight for too long, it can warp or shrink, making it impossible to apply evenly. I always advise clients to store edge banding in a cool, dry place, away from direct sunlight, and to let it acclimate to the shop’s temperature for 24 hours before using it. That small step prevents warping and ensures the band fits tightly against the panel.
I’ve seen these steps work time and time again. Last year, a new client who builds custom interior doors reached out to me because he was having a 15% failure rate on edge banding. He was using a cheap hot-melt adhesive and skipping the degreaser step on the panel edges. We adjusted his process: we switched him to a high-tack HMA, started supplying him with pre-cleaned panels (I add a quick alcohol wipe to every door panel I ship now as a value add), and walked him through calibrating his edge banding machine. Within three months, his failure rate dropped to less than 1%, and he’s since placed three times as many orders with me as he did his first. That’s the goal, right? Not just selling edge banding, but partnering with clients to make sure their work is high-quality, their callbacks are low, and their customers are happy.
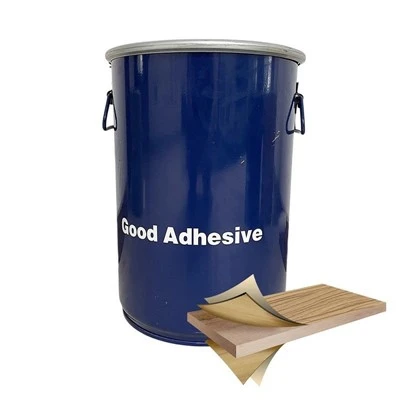
If you’re a cabinet maker, millworker, or remodeler looking to improve your edge band adhesion, these steps are simple, low-cost, and make a huge difference. If you’re in the market for consistent, high-quality door panel edge banding to pair with your process, I’m here to help. We work with small one-person shops and large custom millworks, so no matter your project size, we can supply the right banding, adhesives, and tips to make sure it sticks. Reach out to our team to discuss your needs.
PVC Edge Banding References
- Wood Industry Technical Association. (2021). Edge Banding Adhesion: Best Practices for Wood Panel Products. WITA Publications.
- Hot-Melt Adhesive Manufacturers Association. (2022). Substrate Compatibility Guide for Edge Banding HMAs. HAMA Technical Bulletins.
- Cabinet Makers Association. (2023). Edge Banding Application Standards for Residential and Commercial Door Panels. CMA Industry Guidelines.
Linyi Meador New Materials Co., Ltd.
As one of the most experienced door panel edge banding manufacturers and suppliers in China, we offer a wide range of products with superior quality. We warmly welcome you to buy bulk premium door panel edge banding from our factory. Good service and punctual delivery are available.
Address: Meidu New Materials, No. 66 Zhenxing Road, Tanyi Town, Feixian County, Linyi City, Shandong Province
E-mail: meador@zohomail.cn
WebSite: https://www.meadorfactory.com/
