Hey guys, it’s Jake from the grinding equipment team—you know, the folks you call when your old grinder’s acting up and you need something that actually gets the job done without breaking mid-shift. Today I wanna talk about something that trips up so many new operators (even some old heads, let’s be real): how to run this stuff correctly. I see it way too often—guys rushing through a start-up, skipping a simple check, and then wonder why their grinder’s making that weird screech or outputting uneven parts. Look, we build these machines to last, but they only work as good as the person turning the dials. Let’s cut the jargon, keep this real, and make sure you’re not the one burning out a $10k bearing because you skipped a step. Grinding Equipment

First off, pre-start checks aren’t just a box-ticking exercise—they’re non-negotiable. I know you’re in a hurry to get that production run going, but 5 minutes spent here saves you hours of downtime later. Let’s break this down like you’re grabbing a coffee, not reading a lab manual. First, give the entire unit a visual once-over. No, I don’t mean just glancing—kneel down (it’s fine, not a workout) and check the base, the feed chute, and the grinding wheels. Look for cracks, dents, or loose bolts. I had a customer last month who skipped this, and a loose bolt on the guard flew off, nicked their arm—not fun, and not worth saving 2 minutes. Next, check the lubrication levels. You’ve got gearboxes, spindles, bearings that need oil or grease. Don’t just top it off with whatever’s in the storage closet—check the manual (I know, manuals suck, but we’ve posted quick reference sheets on our site too) for the exact viscosity. Too thin, and it won’t lubricate; too thick, and it’ll overheat the second you hit start. Also, check the coolant. If you’re using a wet grinder, that fluid keeps the wheels cool and flushes out metal shavings. No coolant? Your wheels’ll glaze over in 10 minutes, and you’ll be replacing them before lunch. Pro tip: sniff the coolant every few days. If it smells sour, change it—bacteria grows in there, and that gunk gets into the machine, causing clogs.
Next up, setting up the work zone. You might think, “it’s just a grinder, why rearrange?” But this is where so many mistakes happen. First, clear the area around the machine. No loose tools, no scraps of metal on the floor, no water bottles (I’ve seen someone knock a full one into a grinder—total disaster). Make sure the electrical cord isn’t stretched tight or under heavy stuff. Tripping over a cord mid-op isn’t just embarrassing, it’s dangerous. Then, adjust the work rest and the tongue guard. This is huge. The work rest is the piece that’s right next to the grinding wheel—you want that gap to be no more than 1/8 of an inch. If it’s wider, small pieces can get stuck and fly back at you, or even get caught in the wheel and cause it to wobble. The tongue guard? That plastic or metal cover that’s barely touching the wheel? It needs to cover at least 1/3 of the wheel’s circumference, and be within 1/4 inch of the wheel surface. I know it feels like it’s scraping, but that’s the point—it stops debris from launching. And one thing I see all the time: operators not wearing the right PPE. No, safety glasses and earplugs aren’t optional even if you’re the “tough guy” on the floor. Grinding creates fine particles that you can’t see, and ear damage is permanent. Steel-toe boots aren’t a fashion statement either—if a heavy wrench falls, you’ll be glad you’re wearing them.
When you’re ready to start the machine, take it slow. Don’t just hit the power button and slam in the first part. Let the grinder run idle for 2-3 minutes. Listen for weird noises—rattles, screeches, anything that’s not a smooth hum. If you hear something off, turn it off immediately. Don’t troubleshoot while it’s running—wait for it to stop, unplug it, then check what’s up. I had a guy once who kept running a grinder that was making a clanking noise, and the next thing he knew, a grinding wheel shattered. That’s the stuff that makes the news, and it’s 100% preventable. Once it’s running smooth, start with a test piece. Don’t grab your actual production part first—use a scrap of the same material. Test the feed rate, the pressure you’re applying, how the part comes out. If you’re feeding too fast, the wheel’ll bog down, and the part’ll be uneven. Too slow, and you’re wasting time and wearing out the wheel faster. Pro move: apply steady, even pressure, not a hard push. Think of it like writing with a pencil—light, consistent strokes, not stabbing at the paper.
Now, the actual grinding part: maintaining control. This isn’t like a drill where you hold it and go—grinding is all about stability. Never hold a part with one hand while feeding with the other if you can avoid it. If it’s a small part, use a jig or a fixture to hold it steady. No jigs? At least use a pair of vise grips to keep it from slipping. If your hand slips, that part’ll dig into the wheel, and you’ll lose control. Also, keep your body off to the side of the wheel, not directly in line with it. If something does kick back, you don’t want it hitting you in the chest or face. Another thing: don’t grind on the side of the wheel. Wait, what? Yeah, most guys think the whole wheel works, but actually, the side is only for specific tasks (like grinding slots). If you’re using the face, the side is weaker—you’ll cause the wheel to flex, crack, or even break. Stick to the designated grinding surface, and you’ll get way better results.
Mid-operation, you gotta do checks too, not just at the start. Every 15-20 minutes, shut down the machine (unplug it! Don’t just hit the off switch—wait for it to stop fully) and inspect the wheel. Look for wear, chips, or glazing. Glazing is when the wheel gets coated in the material you’re grinding, so it stops cutting and starts just polishing. If that happens, you need to dress the wheel. Dressing is like sharpening the wheel—you use a diamond dresser to remove the glazed layer and expose new abrasive grains. Skipping dressing will make your parts rough, and your wheel’ll need to be replaced way sooner. Also, check the feed system and the coolant lines. If shavings are clogging the coolant line, the fluid won’t get to the wheel, and you’ll overheat it. Blow out lines with compressed air every couple of hours—simple, takes 30 seconds, and prevents a lot of headaches.
When you’re done with the run, don’t just hit the power and walk away. Shut down the grinder properly. First, turn off the feed and let the wheel run for 30 seconds to clear out any debris. Then, turn off the main power, unplug it (just in case), and clean the machine. Wipe down the grinding wheel, the chute, the base—get rid of all the metal shavings, because if they sit there, they can rust or get into moving parts. Also, clean the coolant tank if it’s due—change the fluid, or at least strain out the shavings. A quick clean after every run keeps your machine working for years, not months.
Now, let’s talk about common mistakes we see all the time, and how to avoid them. First, overloading the grinder. Every machine has a maximum load rating—putting too much material through too fast’ll trip the overload protector, or burn out the motor. We print that rating right on the machine, so check it. Second, using the wrong wheel. If you’re grinding aluminum, don’t use a wheel for steel—they’re made of different abrasives, and it’ll clog instantly. Check the wheel marking: it’ll say what material it’s for, and the grit size. Grit size is important too—fine grit for smooth finishes, coarse grit for heavy material removal. Mix those up, and you either spend too long or get a rough part. Third, ignoring maintenance. We don’t sell grinders that never need upkeep—even the best ones need oil changes, bearing checks, and replacements. Every 6 months, bring your machine in (or if you’re local, our techs can come to you) for a full check-up. It’s way cheaper than replacing parts that broke from neglect.
Look, we’re not just grinding equipment suppliers—we’re people who use this stuff too. We know that downtime costs you money, and safety isn’t negotiable. We’ve built our machines to be user-friendly, but they only perform when operated right. If you’re new to grinding, or you’ve been dealing with wonky results, don’t guess. Reach out—our team knows every model inside and out, and we can walk you through set-up, operation, maintenance, whatever you need. We don’t do high-pressure sales—we do real solutions for real shops.
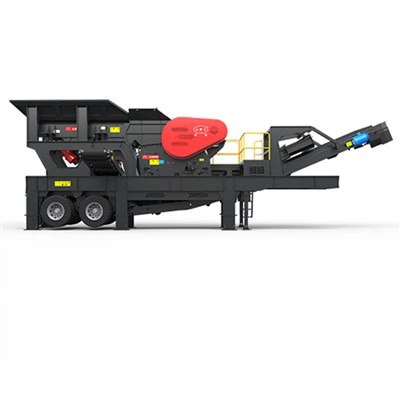
So if you’re tired of broken grinders, uneven parts, or safety scares, hit us up to connect with our procurement and operations team. We’ll answer your questions, help you pick the right machine for your needs, and even share more pro tips to keep your production running smooth. Don’t let a simple mistake turn into a big problem—let’s get you grinding the right way.
Sandblasting Machine Parts References:
- OSHA. (2022). Grinding Machine Safety Guidelines for General Industry. Occupational Safety and Health Administration.
- American National Standards Institute. (2021). Safety Requirements for the Construction, Care, and Use of Grinding Machines. ANSI B7.1-2021.
- Norton Abrasives. (2023). Operator’s Manual for Surface and Cylindrical Grinders. Saint-Gobain Abrasives, Inc.
Linyi Yuxiang Import and Export Trade Co., Ltd.
We are one of the most professional grinding equipment manufacturers in China, specialized in providing high quality products. We warmly welcome you to buy durable grinding equipment for sale here from our factory. Good service and low price are available.
Address: Linyi Comprehensive Bonded Zone
E-mail: sales-top1@bfgoldmachine.com
WebSite: https://www.bfgoldmachine.com/
